As part of your all-inclusive subscription, you get the Google Calendar Sync feature absolutely FREE.
Once connected, this feature will make sure that all sessions are synced to your Google Calendar when you add, edit or delete them in the app.
This system will automatically sync your Clinigo.io sessions to your Google Calendar as you go about your day.
Once the feature has been configured, all you have to do is connect your account once, and the app will automatically do the rest!
Step 1: Edit your profile to connect your Google Calendar
In the left hand menu, click the team app and select your profile to edit it.
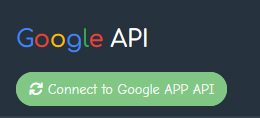
Once on the edit view, scroll to the bottom and you will see a button to connect your Google Calendar.

Step 1: Edit your profile to connect your Google Calendar
In the left hand menu, click the team app and select your profile to edit it.
Once on the edit view, scroll to the bottom and you will see a button to connect your Google Calendar.
Step 2: Click Continue
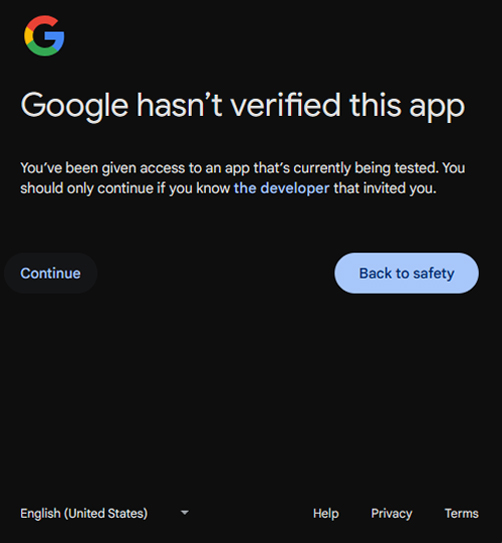
Each Clinigo install is unique. So we create each install a personal Google Apps to sync your data.
Because of that, we would have to verify the app across hundreds of installs.
Because the app is only used by you and your team, the risk is extremely low.
We stand by our app, and our practices, and treat all data with the utmost care.
Simply click continue to agree.
Step 3: Sign in to Google
In order to connect your Google Calendar, you will need to sign in to your Google account.
This is all done on Google’s servers, using the ultra secure OAuth protocol.
Simply sign-in in order for Google to validate your identity.

Step 3: Sign in to Google
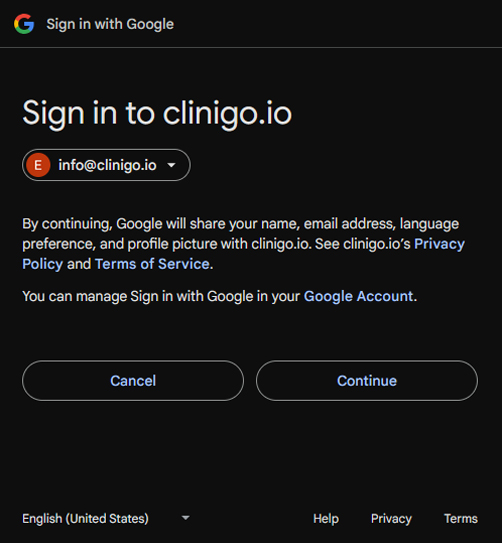
In order to connect your Google Calendar, you will need to sign in to your Google account.
This is all done on Google’s servers, using the ultra secure OAuth protocol.
Simply sign-in in order for Google to validate your identity.
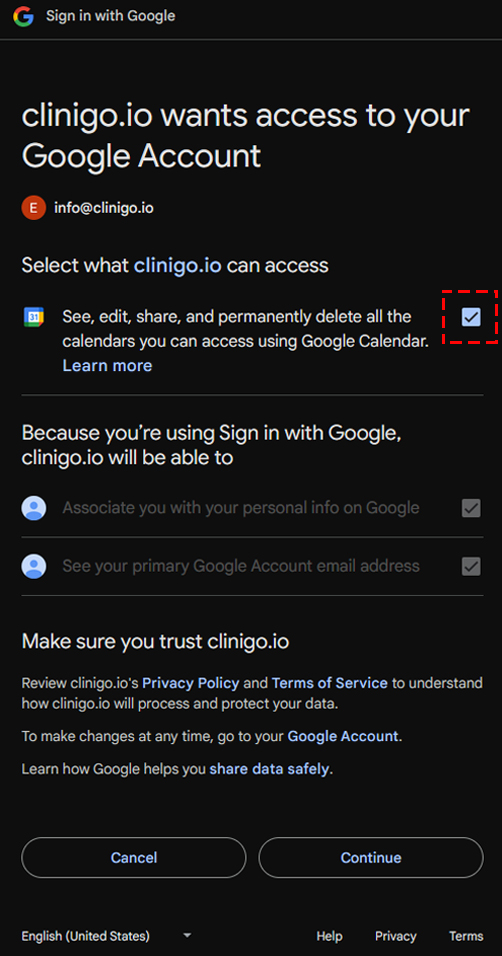
Step 4: Grant the app permissions to connect your Google Calendar
This is the most important step.
In order for the app to be able to add events to your calendar, and modify them when they change, it needs to have permission to view edit and delete things from your calendars.
The data is never transferred outside of the app, and events are never added, updated or modified unless initiated by a member of your team.
Importantly, you may revoke the permission at any time, for any reason at your sole discretion.
Important: If you want the calendar sync to function correctly, you need to make sure you check the checkbox next to “See, edit, share and permanently delete all the calendars you can access using Google Calendar”.
Step 5: Confirm that your Google Calendar is connected
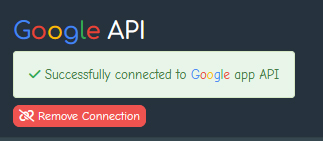
After completing the connection process, your screen should display a confirmation that your account is successfully connected. In the unlikely event there was an issue visually updating the confirmation, you can simply refresh the page and scroll to the bottom to check the connection status.
